§MPWA Whatsapp Gateway (CPanel)
A complete guide to installing MPWA on CPanel.
§Introduction
MPWA is a robust multi-device WhatsApp gateway designed to work seamlessly on various hosting environments, This guide will walk you through the basic installation requirements and provide a step-by-step process to get MPWA running efficiently.
§Features
- You can see the features Here.
§Requirements
Before you begin, ensure your CPanel environment meets the following requirements:
- PHP: v8.1 or higher.
- Node.js: v18 or higher.
- MySQL: A configured MySQL database instance.
These tools are critical for MPWA's functionality and must be installed and configured correctly on your hosting environment.
§Installing
§Step 1: Create a Domain
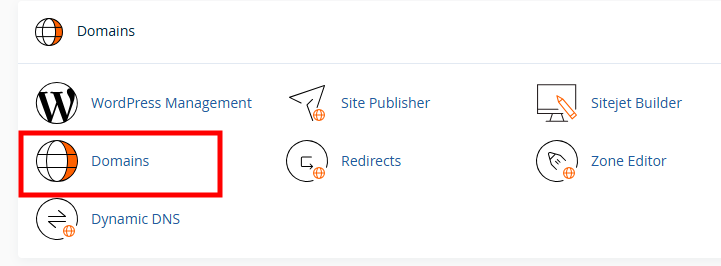
- Log in to your CPanel.
-
Navigate to Domains and create a new domain if you haven't already.
§Step 2: Create a Database
-
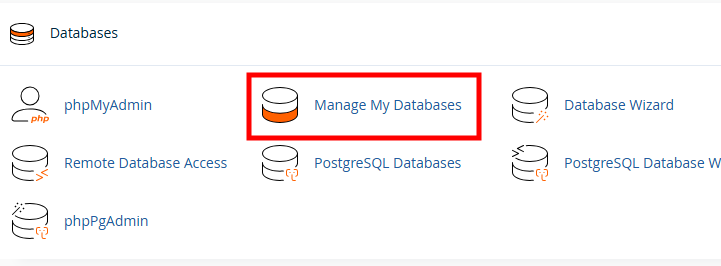
Go to Manage My Database in CPanel.
-
Under the New Database section, enter a name for your database, e.g.,
wa, and click Create Database.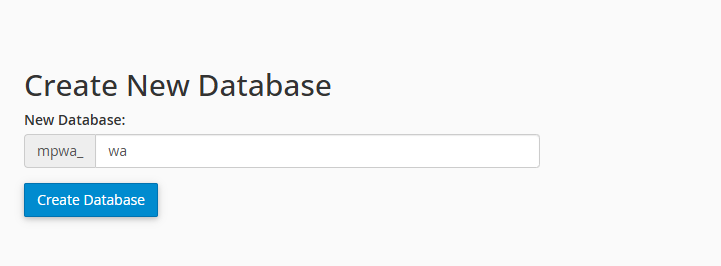
-
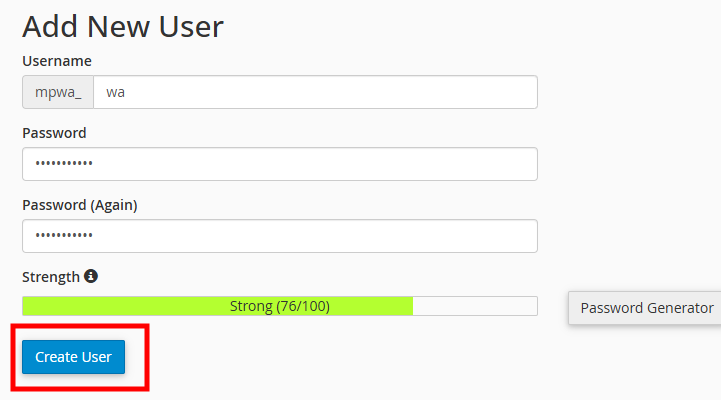
Return to the Manage My Database page and create a new database user:
- Enter a username and password in the Add New User section.
- Click Create User.
-
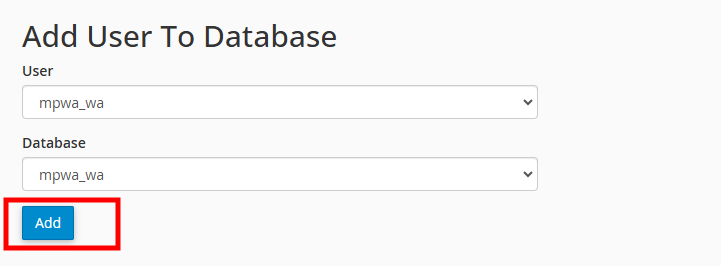
Link the user to the database:
- In the Add User to Database section, select the database and user you just created.
- Click Add.
-
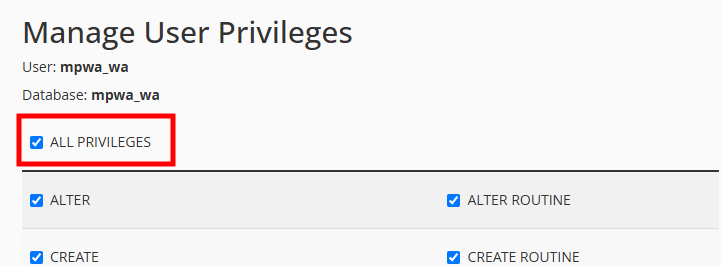
On the Manage User Privileges page, select ALL PRIVILEGES to grant full access.
- Click Make Changes.
- Click Make Changes.
§Step 3: Download the MPWA Files
-
Download the latest MPWA version from the following link:
Download Latest Version -
Open File Manager in CPanel and navigate to the folder of the domain you created.

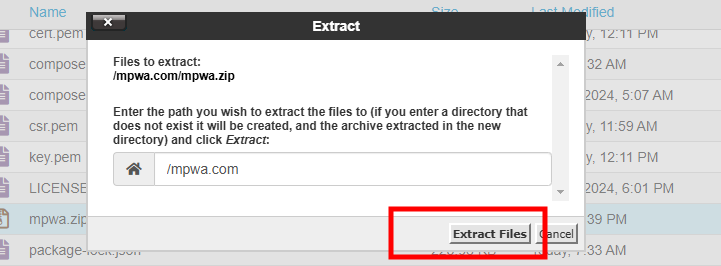
-
Upload the downloaded ZIP file to this folder by clicking Upload, and then extract the files using the Extract option.
§Step 4: Start the Installation
-
Visit your website URL. The installer page will automatically open.
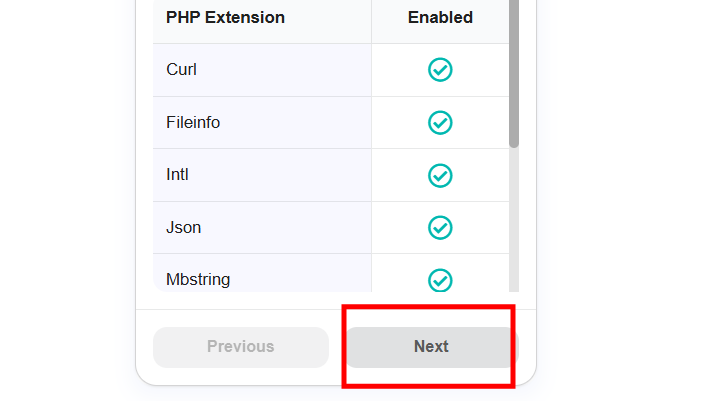
-
On the installer page, you will see the required configurations, including PHP version, MySQL version, and required functions.
- If all checks are marked with a green tick, click Next to continue.
- If any required functions are disabled, contact your hosting provider to enable them.
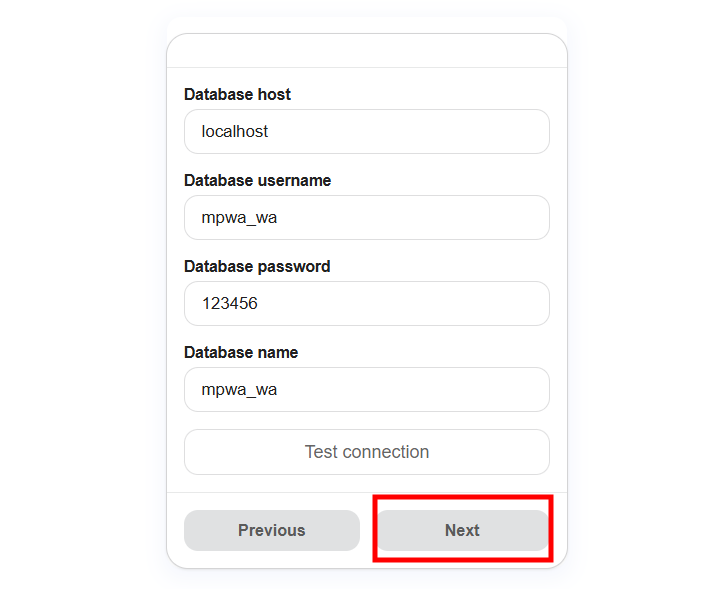
§Step 5: Configure the Database
- Enter the database credentials you created earlier, including:
- Database Host
- Database Username
- Database Password
- Database Name
Click Next to proceed.
§Step 6: Set Admin Details
-
On the next page, enter the following details for the admin user:
- Admin Username
- Admin Password
- Email Address
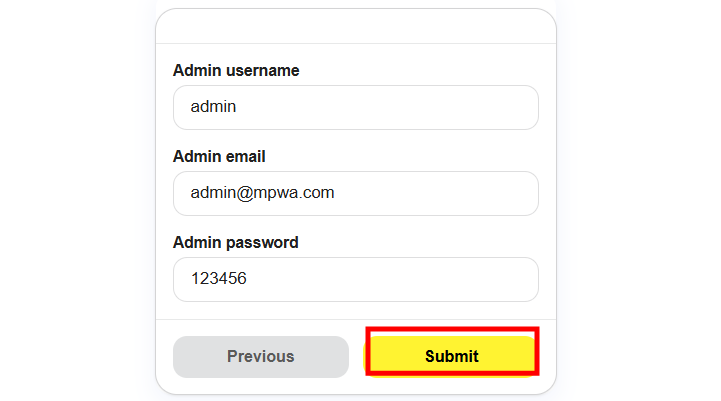
-
After completing the form, click Submit. This will finalize the installation and redirect you to the MPWA admin dashboard.
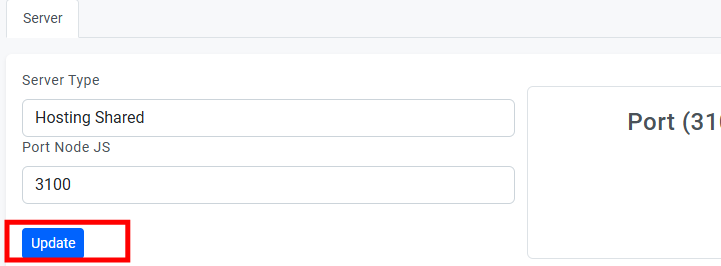
§Step 7: Configure the Server Type
-
In the MPWA admin panel, go to Admin > Server Settings.
-
Select the appropriate Server Type:
- Localhost: For personal use on your own machine.
- Hosting: For shared hosting environments.
- Other: For VPS, VDS, or dedicated servers.
Note:
If you choose Other, the script will usewsorwssprotocols. This option is not available on shared hosting, as it requires access to specific ports. For shared hosting, always select Hosting. -
Enter the Port number (e.g., 3100, 3121, or any 4-digit number except 8080 or 3306).
-
For Nginx users: If your shared hosting uses Nginx, user
httpsinstead ofhttpas Nginx automatically redirects requests fromhttptohttps.
§Step 8: Verify .env Settings
- Open File Manager in CPanel.
- Locate the
.envfile in the root directory of your project. - Verify and update the settings as follows:
§For Shared Hosting:
APP_URL=https://yoursite.com
WA_URL_SERVER=https://yoursite.com
PORT_NODE=3100
TYPE_SERVER=hosting§For VPS, VDS, or Dedicated Server:
APP_URL=https://yoursite.com
WA_URL_SERVER=https://yoursite.com:3100
PORT_NODE=3100
TYPE_SERVER=otherImportant:
If you're using https for your Node.js application, ensure SSL certificates are installed. For shared hosting or servers with Nginx, you don't need separate SSL files for Node.js. For Apache users, refer to the following guide for setting up SSL for Node.js:
[Node.js SSL Guide](?doc=Node.js SSL Guide)
§Step 9: Set Up Node.js
- In CPanel, navigate to Setup Node.js App.
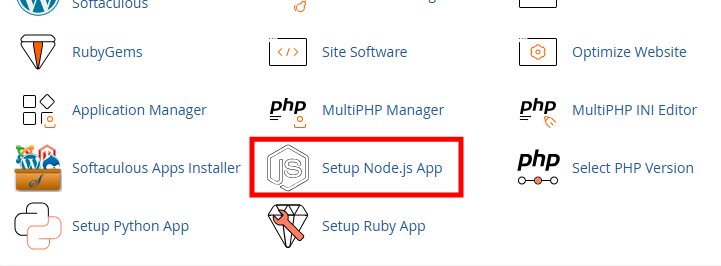
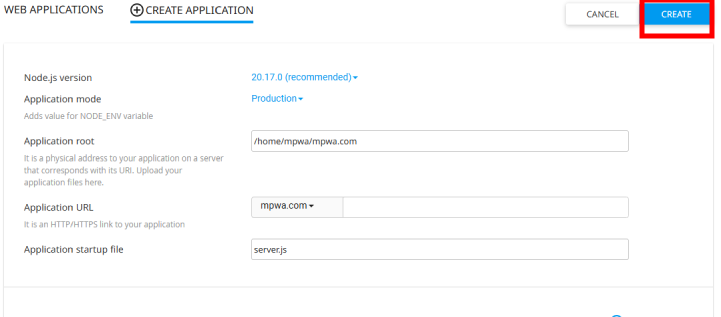
- Click CREATE APPLICATION and fill in the following details:
- Node.js version: Select
20.17.0or any version above18. - Application mode: Set to
Production. - Application root: Enter the path to your project directory, e.g.,
/home/username/mpwa.my.id. - Application URL: Select your domain name.
- Application startup file: Enter
server.js.
- Node.js version: Select
Click CREATE at the top to finalize the application setup.
-
After creating the application, click START APP to start the Node.js application.

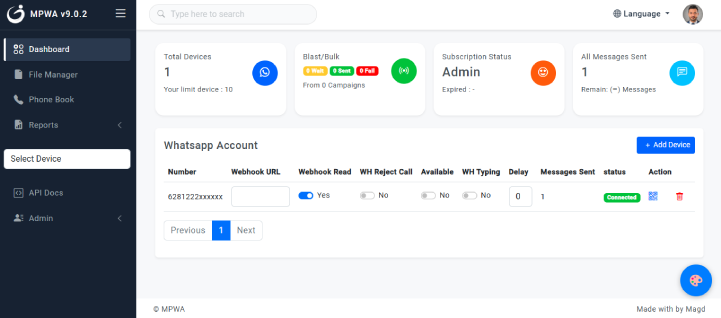
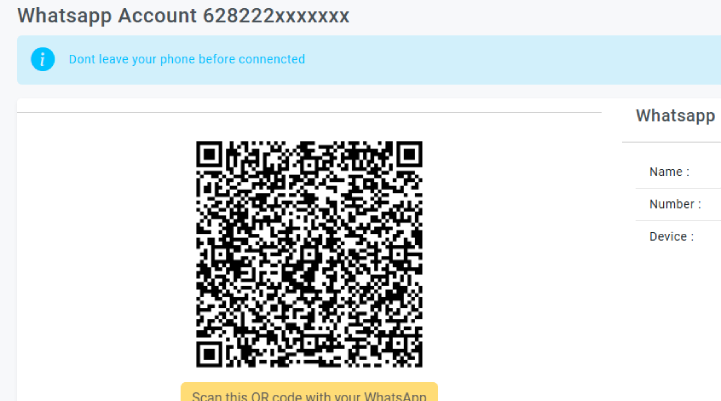
§Step 10: Finalize Installation
Congratulations! MPWA is now successfully installed. You can now login to the admin panel and proceed to:
- Add your phone number.
-
Generate the QR code to connect your WhatsApp account.

§Troubleshooting
If you encounter any issues during the installation process:
- Ensure all required PHP functions and Node.js are properly configured.
- Verify that your hosting environment supports the required configurations.
- You can go to Troubleshooting page, you may find your answer here.
- Contact your hosting provider if necessary for assistance with permissions or configurations.
You're all set! Enjoy using MPWA to manage your WhatsApp communications efficiently.